

Add Plan Picker
What is the Yari Flow Plan Picker?
The Yari Flow Plan Picker is an app block that allows customers to choose between one-time and subscription purchase options on a product page.
It connects to the product page’s Add to cart form and ensures that the selected Yari Flow Selling Plan is applied when a customer adds a subscription product to their cart.
The app block is installed automatically with Yari Flow and can be configured through the Shopify theme editor without editing the theme code.
Self-serve App Block Install
Add the Yari Flow Plan Picker using App Blocks
This guide explains how to add the Yari Flow Plan Picker to your Shopify product pages using an App Block.
Note App Blocks are only supported by Shopify Online Store 2.0 themes. If your theme does not support Online Store 2.0, use the manual installation method instead.
Add the Yari Flow Plan Picker to your product pages
Step 1: Open your Shopify themes
In your Shopify admin, go to: Sales channels > Online Store
Step 2: Duplicate your live theme
Duplicate your current live theme before making any changes.
This allows you to configure and test the Yari Flow Plan Picker without affecting the storefront customers currently use.
Step 3: Open the theme editor
Find the duplicated theme and click Customise.
Step 4: Open the product template
Use the page selector at the top of the theme editor to navigate to the relevant product page template.
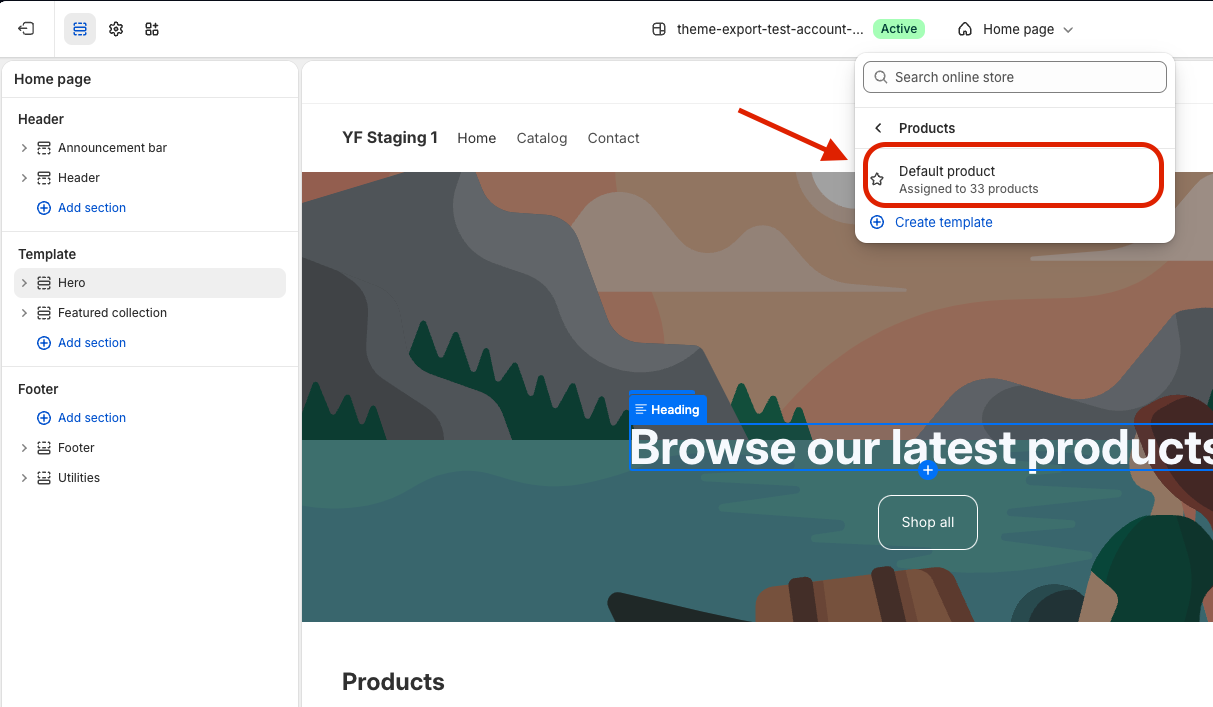
Your store may use the Default product template or a separate template created specifically for subscription products.
Step 5: Add the Yari Flow App Block
In the product page sidebar:
Open the Product information section → Click Add block → Select Purchase options - Yari Flow.
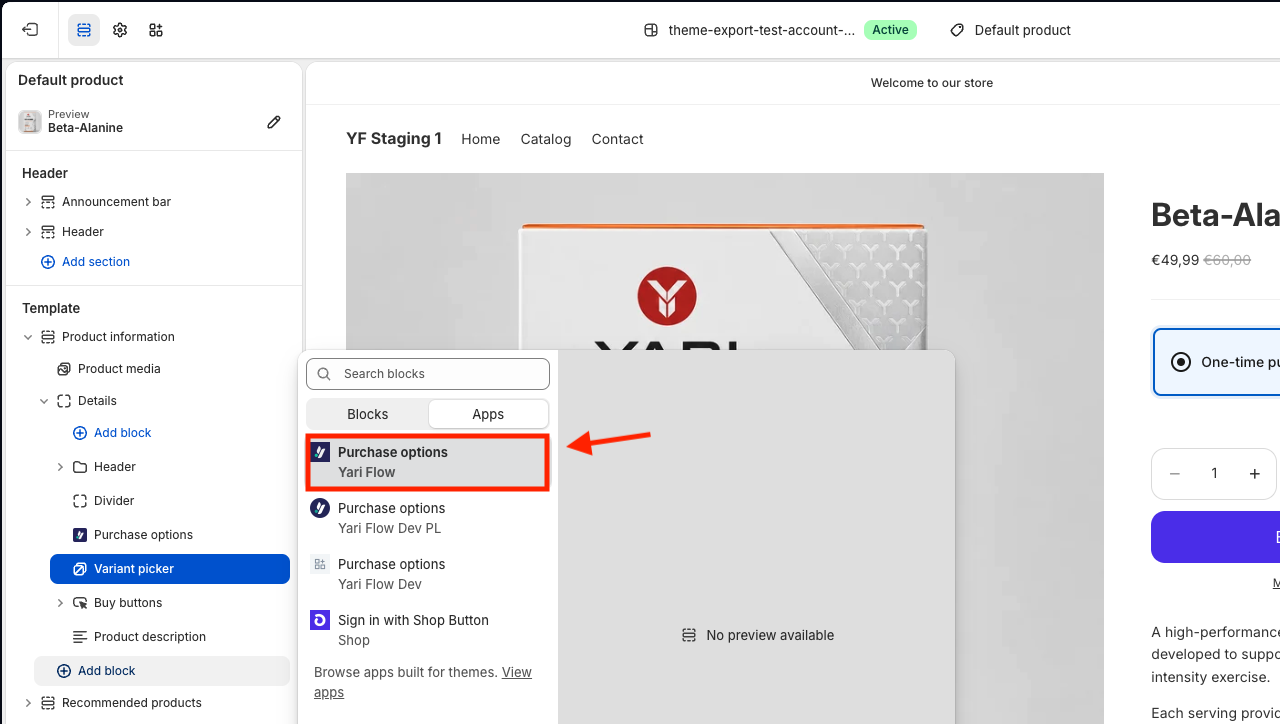
Step 6: Position the Plan Picker
Drag the Purchase options - Yari Flow block to the preferred location on the product page.
The Plan Picker is usually positioned beneath the variant selector and before the quantity selector or Add to cart button.
Step 7: Customise the Plan Picker
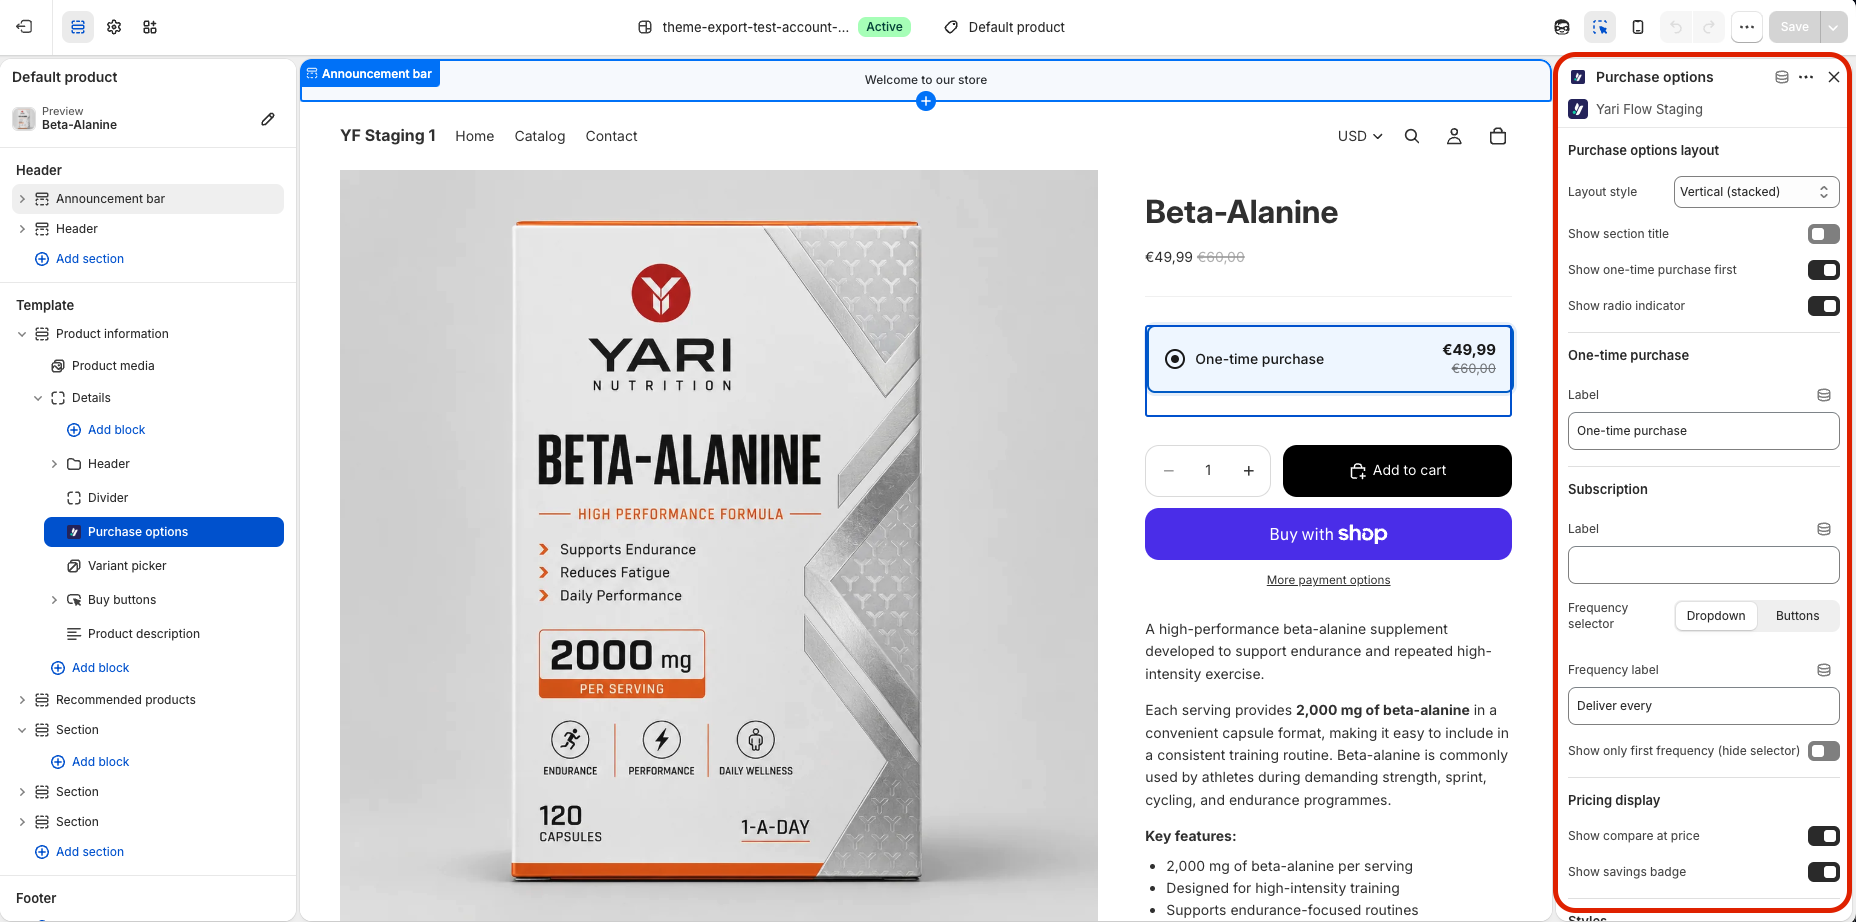
Use the App Block settings to customise the Plan Picker’s copy, appearance, layout, and behaviour.
The settings allow you to customise the Plan Picker’s copy, pricing presentation, and behaviour.
For example, use:
- One Time Purchase Label to change the one-time purchase label
- Subscription Label to change the subscription label
- Frequency Selector to change the type of selector of the Subscription
- Frequency Label to change the frequency label
- Pricing Display to change how the subscription price appears
- Styles to change visuals of the overall block
Each setting includes a description explaining what it controls.
When finished, click Save.
Step 8: Test the subscription purchase flow
Preview the duplicated theme and confirm that the Plan Picker works correctly.
- Open a product that has an active Yari Flow Selling Plan.
- Select a subscription purchase option.
- Add the product to the cart.
- Continue to Shopify Checkout.
- Confirm that the subscription interval appears beneath the product, such as Every 4 weeks.
If the interval appears in checkout, the selected Selling Plan is being passed to Shopify correctly.
Step 9: Publish the theme
Once you have completed testing and confirmed that everything works correctly, publish the duplicated theme.
Your store will then be ready to sell subscriptions through Yari Flow.
Customise the Yari Flow Plan Picker
The Purchase options - Yari Flow app block includes settings for controlling the Plan Picker’s appearance and behaviour.
Not using Shopify Online store 2.0
In case you are not using Shopify Online store 2.0, follow the FAQ for Add Yari Flow Plan Picker files to a new theme.

